Brake Pad Replacement Tutorial
There are brake pads for disc brakes and brake shoes for drum brakes, and this article is about brake shoes for drum brakes.
Tools / Materials:
KM-346
Screwdriver
Spring pliers
Methods/Steps:
I. First you need to know when it is time to change the brake pads.
1. Check the brake linings every 1.5000 km, whenever the brake linings are worn to within 2 mm of each other,
2, if the brake friction linings are fixed with rivets, you should replace the linings when they are worn to a distance of less than 0.5 mm from the rivet head, and replace the friction linings of the rear axle drum.
II. Then how to change?
1. lift and support the vehicle
2. mark the position of the wheel in relation to the hub
3. remove the wheels and tires
4. remove the brake drum
Finish giving these prior work
5 Remove the parking brake cable from the shoe cable guide.
6. Use spring pliers to remove the return spring on the shoe

7. Remove the pull-back spring and spring bracket with a screwdriver

8. Disassemble the adjusting rod
9. Use KM-346 tool to remove the compression spring laminations Spring and its retaining pin
10. Remove the brake linings
Note: Be sure to replace all brake friction linings on one shaft.
Now that it is removed, see that it is installed and replaced.
1. clean the surface of the brake floor
2. lining contact area with a point of noise reduction soft cloth, as shown

3. Connect the brake cable to the brake slave shoe lining parking lever

4. Install the brake slave shoe lining with the retaining pin Compression spring and book spring plate
5. Install the lower pull back spring and brake shoes
6. Make sure the parking cable is in the correct position (see arrow in drawing)
7. Install the slider adjuster between the two brake friction linings
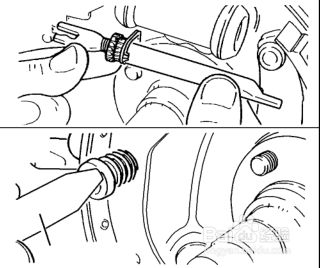
8. Install the small round washer on the new brake front friction lining (see arrow in diagram).
(see arrow in diagram)
IMPORTANT: Make sure the small round washer is installed on the brake friction lining or brake failure or damage to the brake friction lining may occur.

9. Attach the adjusting bracket with spring to the swivel pin
10. Install the adjusting bracket spring
11. Install the upper pull back spring with spring pliers
12. Install the brake drum
13. Adjust drum bearing clearance
14. Adjust the brake friction lining clearance Perform 10-15 brake applications to adjust the brake to ensure proper clearance.
NOTE: Pressing the brake pedal hard and repeatedly will automatically adjust the brake friction lining clearance.

15. Mounting tires and wheels See Tire and wheel replacement
16. Align the original markings on the wheels and drums
17. lower the vehicle
18. Fill to the proper level with clean brake fluid
19. grind the linings and drums
Complete the brake pad replacement

